
The Shelter at Home order in most states is really starting to get on peoples nerves. At least they are getting on mine. After having fun with masks, I needed something to do. Since Associated RC28 radio control cars were sold out, today became wallpaper removal day.
After remodeling a dozen homes over my life with my husband, one thing I have broken the code on is wall paper removal. And yes to get this done in four hours he did help. Please don’t blame me for the quality of the photos, he took those too.
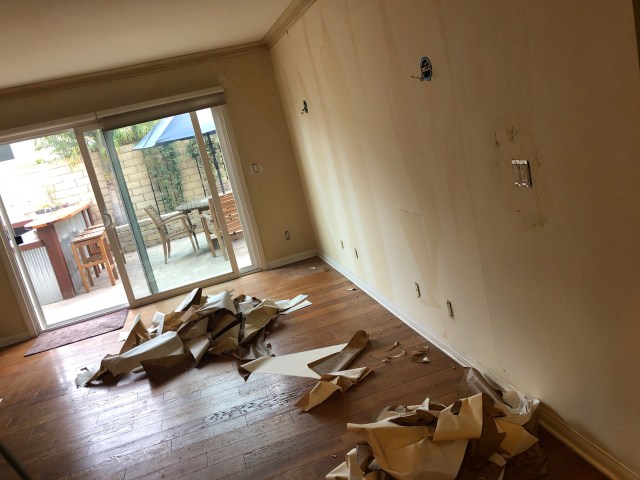
The process I use is an easy 3 steps for wallpaper removal. The part I have to warn you about in advance if you have never removed wallpaper, is you might not like what you find. During todays adventure, I found another layer of older wallpaper in a couple of areas, so I had to do the process twice. In that case it became a six step process.
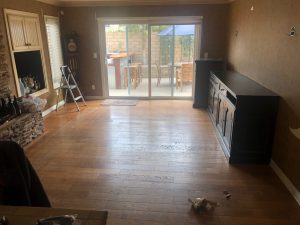
Being home for a month is a great opportunity to get stuff done on your list. This wallpaper has been bugging me for ten years. Today I ran out of excuses, I couldn’t even buy one. Hidden behind the dining buffet was a huge tear in the paper.
The Secret Sauce:
The first thing to know when preparing to remove wall paper is that all that stuff about scoring, and using fancy removers never worked for me. It took a few tries, and I figured out the secret sauce by accident. It isn’t anything expensive either. After running out of the expensive wall paper remover spray, I tried Simple Green®.
At first it was a little harsh so after some testing I found that a 50/50 mix with water is perfect. I also learned that spray bottles just wear out your hands. I prefer a 1 quart pump bottle for small jobs and a 1 gallon pump sprayer for larger jobs.
The Tools
1 Gal Simple Green
Pump Sprayer
Spray bottle with water
Metal Scraping Knife or Putty Knife 1″ blade
Plastic Patch Knife or Putty Knife 3″ blade
The Process
The Easy 3 Step Wallpaper removal process is just these three steps:
Step 1. Use a putty knife to peel off the top layer of the wall paper. Many newer wallpapers are a fabric vinyl blend and they peel off of the backing very easily.

Step 2. Spray two or three strips with the secret sauce until they are damp. You don’t need to have the liquid running down the paper. Two thin passes is better than one runny one. Wait about 3 minutes to let it soak in. If you see any spots drying up, hit them with the water bottle.
Step 3. Starting at the top of the wall paper strip, use the plastic patch knife to peel a corner. Gently pull straight off the wall at a 90 degree angle. It should come off in one piece.

The first time I removed the wallpaper from a small bathroom it took several days. Today I was able to do a full size dining room in about four hours including cleanup.
Simple Green can leave behind a slightly acidic residue. If you see any green left behind, use a wet rag to wipe it down. You will need to wait a day or two before you can texture, prime and paint the wall.
As I said at the beginning don’t be surprised to find a few holes you didn’t know where there or funny notes. It amazes me what people will paper over.
Kelly Bourquin is a freelance photographer and owner of Custom PhotoCraft.