
DIY Ceramic Car Coatings: Real-World Test Results From Mothers vs. Adam’s
For collector cars and daily drivers alike, maintaining a deep, liquid-like gloss while protecting your vehicle’s paint from the elements is the ultimate goal. Over the years I have used every “As Seen On TV” wax, Maguire’s®, Mothers® and Griot® product I could find. None of them lasted an entire year, most lasted a month or two if I used a commercial car wash. Ceramic changed that in a big way.
While professional ceramic coating applications can easily run into thousands of dollars, the DIY market has exploded with consumer-friendly alternatives that I think are just as good if you take the time to do it right.
To see how two of the DIY options worked in the real world, we ran a side-by-side, long-term test on two separate vehicles using two of the biggest names in the business: Mothers and Adam’s Polishes.
We bought two “kits”, one from Mothers and one from Adams. Each kit had a polish, paint prep, ceramic, microfiber towels and polishing cloths. An Adams Lambswool mitt was used with Mothers Car wash soap. I was too cheap to buy two big bottles of soap.
Here is exactly how they stacked up under real-world conditions.
The Foundation: Preparation & Wash Routine
Before a single drop of ceramic product touches your cars paint, there is an absolute golden rule: The coating is only as good as the paint underneath. Neither product will mask clear coat imperfections; in fact, a ceramic layer will lock them in and as we found on one car, make them stand out more.
For our test, both cars underwent an identical, rigorous preparation and maintenance workflow:
- The Prep Steps: Each car was washed, polished (paint corrected) and paint prepped in accordance with Mothers and Adams directions which were nearly identical.
- Wash: To maintain the integrity of the coatings post-application, both cars were washed exclusively using a premium lambswool mitt to eliminate wash-induced marring.
- Dry: To avoid dragging towels across the paint, a high-speed air blower was used to rapidly clear the vast majority of standing water. A clean, plush microfiber cloth was used only for the final touch-up to catch remaining stray droplets.
- Polish: Using a Porter Cable orbital polisher we used the same brand of polish for the car as the ceramic we planned to apply
- Prep: With a couple of clean dry microfiber towels we sprayed the car down in 3′ areas with paint prep and wiped it off.
- Ceramic: The ceramic was applied per the manufacturers directions.
1. Mothers CMX Ceramic®: The Quick Sprint
For Car 1, we applied the Mothers CMX Ceramic Spray Coating. This formulation leans heavily on a user-friendly SiO2 (Silicon Dioxide) and TiO2 (Titanium Dioxide) blend designed for rapid application. Mothers claims it to be the easiest DIY ceramic coating and they might be right.
The Application Process
If you are short on time, Mothers is a dream to work with. It features a straightforward spray-on, wipe-off application process. There is no stressful waiting for the product to flash or cure on the panel; you simply work section by section with a microfiber towel. The change in paint reflection makes it easy to see where you missed a spot.
Longevity & Performance
While the initial gloss was excellent, the trade-off for such an easy application shows up in its lifespan. In our testing, the Mothers CMX coating provided excellent hydrophobic behavior and shine for about three months before requiring a topping or reapplication. This is on a car that sees a commercial car wash once or twice a month. Hand washing with a more gentle car wash soap will likely help it last longer.
2. Adam’s® Graphene Ceramic Coating: The Marathon Competitor
For Car 2, we stepped up to the liquid bottle application from the Adam’s Polishes Ceramic Coating line, which utilizes a semi-permanent ceramic resin structure.
The Application Process
Applying Adam’s is a much slower, more methodical process. It requires applying the liquid drops and using a small suede applicator block. After applying a few drops to the block, you make a tight crosshatch pattern, waiting for the product to “flash” (rainbow appearance), and carefully buffing away the residue with special suede towels. It requires patience, steady lighting, and time. We tried to use the special UV light Adams sells but really couldn’t see the point.
The caution with the Adams Graphene is that if you let it sit too long it will cure and look like a smudge on the paint. Admittedly the first car we used the Graphene on, “Car 2”, came out perfect. I got lazy on Car 3 and there were several spots on it that required me to polish again and re apply the coating. I didn’t make time to do it right the first time but I found time to do it twice.
Longevity & Performance
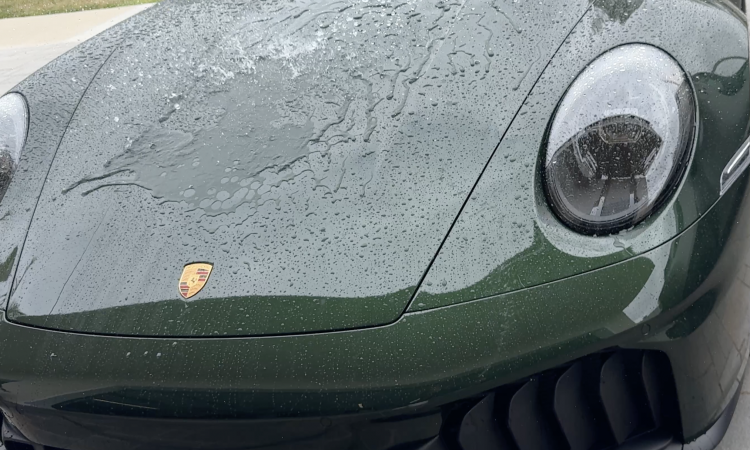
The extra time and elbow grease pays off with the Adams Graphene. At the time of writing, the Adam’s coating has been on the test vehicle for over a year, and its performance hasn’t wavered. Dirt and road grime effortlessly rinse off during regular maintenance washes without aggressive scrubbing. A fourth car (The Targa in the photo) was recently coated with the latest Adams Advance Graphene, and we are very happy with the shine.
In both cases we also treated the windshield glass. Being a super-fan of RainX® I wanted to see what the two ceramics did for the windshield. The test was RainX® on the passenger side of the windshield and the Ceramic on the right. Sitting in the car going through a wash tunnel, it was easy to see how well the RainX® and ceramic kept the windshield clear. Three car washes later the RainX® was gone. I have since used Adams Graphene on the glass in my shower as well.
Happy Polishing.
Google Gemini Flash 3.5 was used to assist in generating content and formatting for this article.